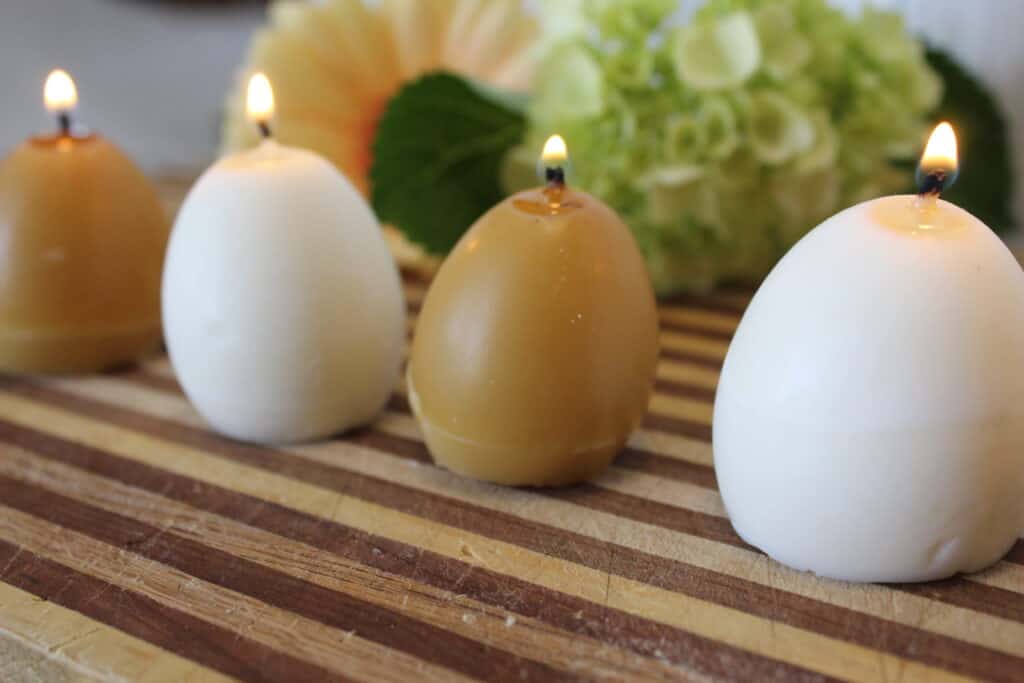
DIY Egg Candles for Easter
Using a few simple ingredients and old egg shells you can make these super cute DIY egg candles for easter.
Why Egg Candles?
The short answer is they are cute, a creative way to use old eggshells, and are just fun to make.
It is believed that eggs and the Easter bunny themselves go back to pagan traditions of celebrating the Spring Equinox. Spring is a time for birth and renewal, and rabbits are pretty infamous for having lots of babies. Eggs of course also represent fertility and rebirth. In the Christian community, the egg represents the resurrection of Jesus.
Decorating and using eggs around this time of year is common in many cultures. In the ancient Christian culture, eggs were not allowed during Lent (a time of fasting) so it was a big celebration when they could be enjoyed again as of Easter.
This post contains affiliate links, which means I make a small commission at no extra cost to you. See my full disclosure here.
Tools and Supplies for Egg Shaped Candles
Wax
When it comes to what wax to use, I would suggest either soy wax or beeswax.
The benefit of soy wax is it is cheaper, white, and water-soluble. That means you can wash it with soap and water and it will clean up easily. The wax I will link to below in the shopping list has also been designed to be melted in the microwave so it is much more user-friendly.
A negative of soy is it will have no scent unless you add one, which involves purchasing additional items. There is also a little science behind adding scent to soy wax so it will take some research if you want a candle with a certain fragrance.
Beeswax
Beeswax has many great qualities. First, it burns incredibly clean. Second, beeswax candles naturally have a light and lovely honey aroma. Lastly, depending on what beeswax you use, it will have a beautiful natural color ranging from soft yellow to golden brown.
The negative side of beeswax is the cost. It will definitely set you back more than soy wax will.
Secondly, it is darn near impossible to clean off items. Any items you use for melting wax will be waxy forever, so plan to use thrifted or designated items only for making beeswax egg candles.

Intact Egg Shells
We’ll talk more about this below, but you will need egg shells that have only a hole in the bottom broken out and a small hole for the wick to come out the top.
Wicks
These candles are pretty small so you can use a square wick or a flat braided wick. Check the shopping list below.
Egg Carton
The easiest way to pour these candles is with an egg carton. Plan to toss it after as it will likely get waxy.
Melting Pots
If you plan to use the soy wax I link to below, you can use a glass liquid measuring cup with a pour spout and just pop it in the microwave.
When using beeswax or if you don’t want to use a microwave, you will need to set up a double boiler situation. If you plan on making these again or doing other beeswax crafts, I recommend just investing in a simple pouring pitcher for about $12. You absolutely can melt the wax in a double boiler pot on the stove or even in a crock pot.
Just make sure you do not put the beeswax on direct heat, only use a double boiler or a crockpot set on low. Additionally, it is crucial to have a pouring vessel with a spout to get wax into the shells with ease.
Final reminder, anything you use with the beeswax is going to have beeswax on it forever. DO NOT try to wash beeswax down your sink or pour it down your sink.
How to Make DIY Egg Candles for Easter
These candles are so cute and creative! Whether you celebrate Easter or Ostara, these candles will look beautiful on your holiday table.
Prepping the Eggshells
You can either save up eggshells over a few days or crack them all at once and use/save the eggs for later cooking.
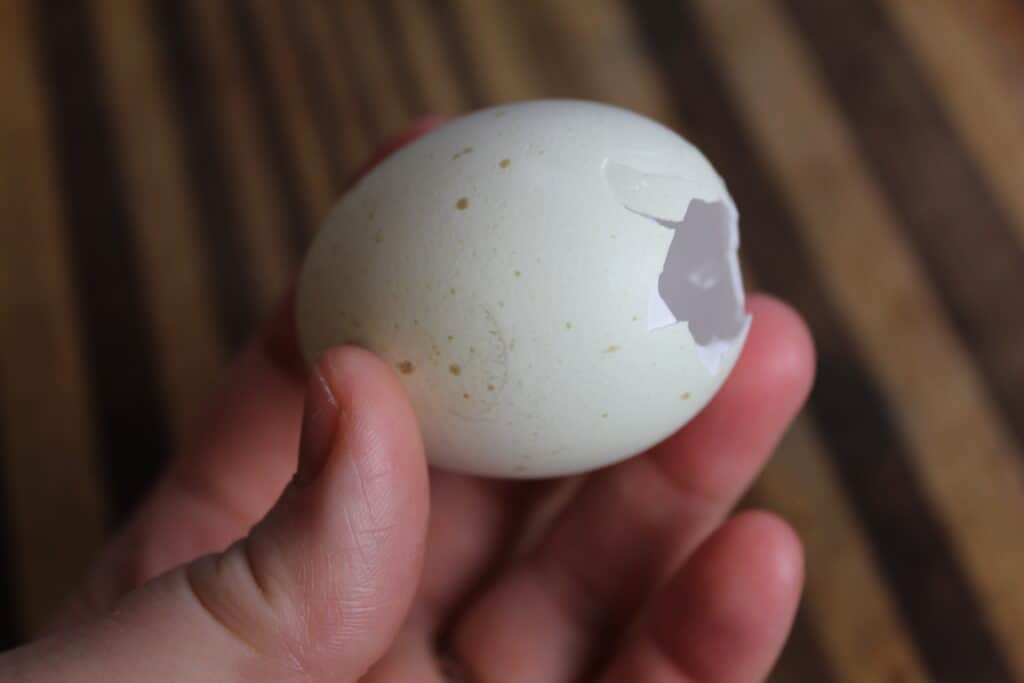
To crack them, give a gently but firm tap on the bottom of the egg, meaning the larger of the two ends.
Carefully remove the shell and break through the outer membrane to release the egg into a bowl.
Try to keep the hole small. Big enough to poke your thumb into but not much bigger.
Rinse the shells out with water, then set them somewhere safe to dry for a few hours to overnight.
Next, using a sewing needle or the tip of a knife, carefully make a small hole in the pointed end of the egg. This is where the wick will come through.

Next, poke a wick through the bottom hole into the egg. Use a pair of tweezers to pull the wick through so you have an inch or so on either side.
Use blue painters tape to tape down the wick end. Make sure the tape is secure to keep wax from leaking out the hole around the wick.

Place them pointy side down in the egg carton.
Melting Wax
It’s hard to say exactly how much wax you will need for this project given that all eggs are different sizes. I made eight eggs of various sizes and used both soy and beeswax. For the soy wax, it took 1.5 cups of wax pellets to fill four eggs.
For the soy, place it in a glass measuring cup and pop it in the microwave. Microwave in 30 second bursts. Stir in between. After 1-1.5 minutes, check the temperature. You want it to be 160 for pouring the wax. Do not heat it to over 200 degrees.
For beeswax, place the wax in a pot in a double boiler and melt until it reaches the pouring temp of 160 degrees.
Pouring & Propping the Wick
Once your wax, no matter which type, reaches 160 degrees it is ready to pour.
Do a nice, slow, steady pour into each candle. Fill it to the tippy top!

Next, use something like a clothespin to keep the wick erect in the center of the shell.
As the wax dries, primarily the beeswax, it may get little holes or crack. It’s a good idea to keep some warm wax to fill any gaps.
Drying and Peeling the Egg Candles
Allow the eggs to set/dry for several hours. Then pop them into the freezer for an hour or so. This will make the wax shrink away from the shell and be much easier to peel.
After they are peeled, trim the wick off the bottom completely and trim the top wick to about 1/4 inch.
Curing Homemade Egg Candles
Before you burn your candles, you need to let them cure. This means letting it sit out in the open air for a period of time for all the excess moisture to evaporate.
Beeswax candles should cure for 7-10 days. Soywax should cure 24-48 hours.
Burning your DIY Egg Shell Candles
As you burn these candles make sure you have some sort of heat-safe plate, board, etc. under them to catch the wax as it melts. They should burn for at least two hours. Or you can just keep them as cute decorations.

Troubleshooting
After peeling your candle may have a white sort of film on it. This is part of the egg membrane. Gently scrap it off with a sharp edge or scrub under warm water.
The soy wax is softer, so it may get little knicks during peeling. You can gently rub the spots with your finger and the heat from your body will gently melt the wax every so slightly and smooth out the mark.
Watch and Learn
Here is the step-by-step process for making egg shell candles. My beeswax I think wasn’t quite hot enough so I had to do a second pour later on which resulted in… let’s say scrappy looking eggs.

Shop this Post
Pin it for Later


One Comment
Comments are closed.