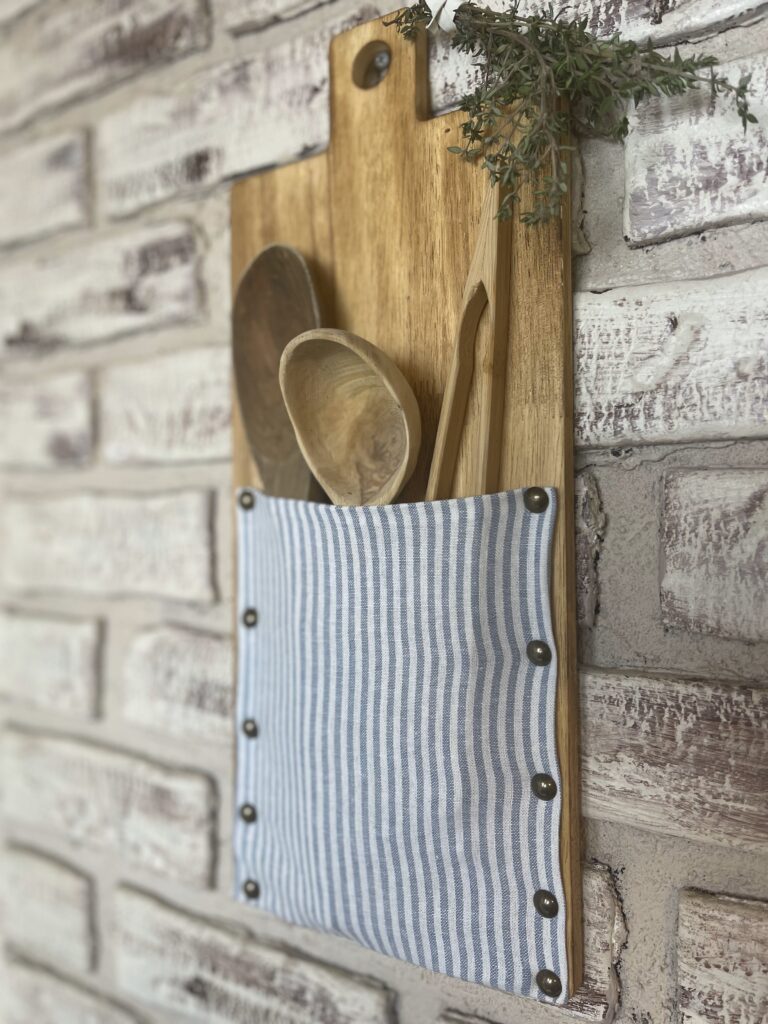
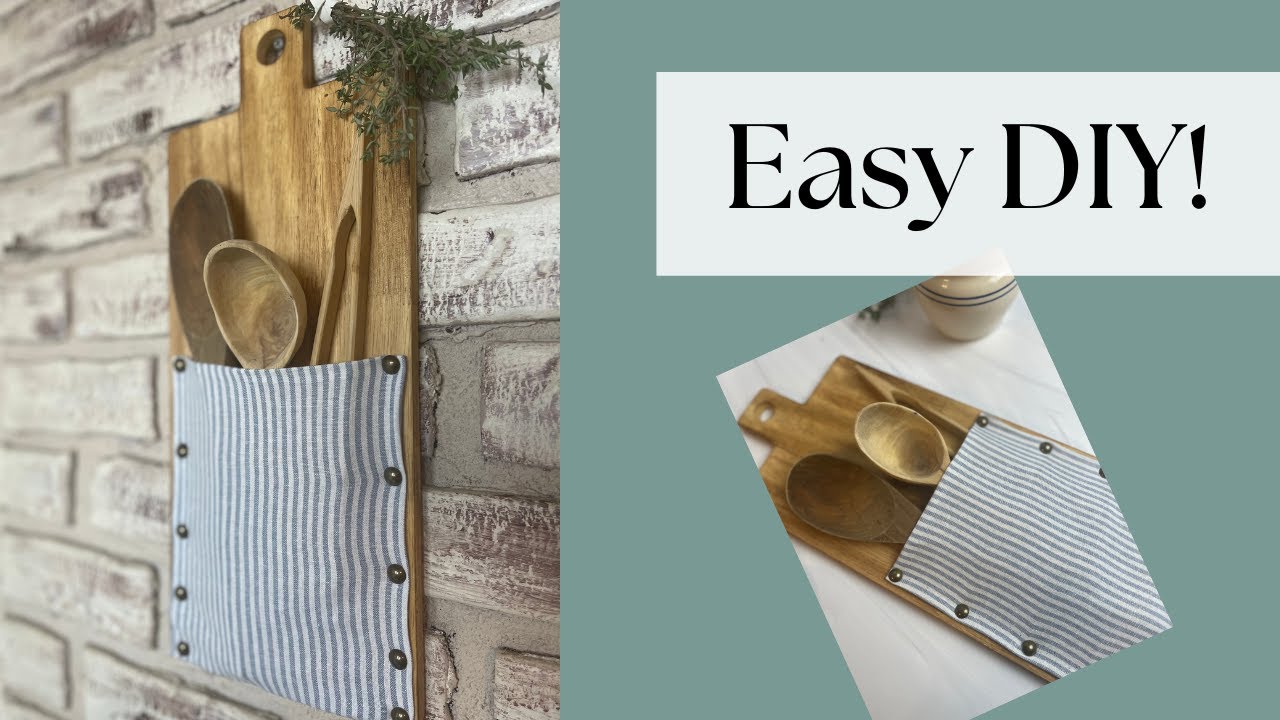
Farmhouse Cutting Board Decor
A cutting board can be more than just a darn useful tool, it can also be a functional piece of kitchen storage or organization. The best part of this project is how easy it is. Let me show you step-by-step how to make this cute and functional farmhouse cutting board decor.
This post contains affiliate links, which means I make a small commission at no extra cost to you. See my full disclosure here.
Supplies You Need
- Cutting Board with a Handle (I like this one on Amazon)
- Pushpins
- Hammer
- Measuring Tape
- Pencil
- Scissors
- Fabric of Choice
- Hammer on-able work space (scrapwood, other cutting board, etc.)
How to Make a DIY Farmhouse Cutting Board
Before I dive into the instructions, I recommend checking out the YouTube video below. I take you through the process step-by-step!
If you are more of a reader/learner then let’s dive in!

Decide on Your Style and Measure
First, do you want your fabric to have a raw edge, or will you hem it? This means, do you want the frayed edge of your fabric to show, or will you fold it under and then pin it (which is what I did) giving you a clean edge?
Next, decide how high up you want the fabric to go on the cutting board.
Once you have decided these things, it is time to measure.
Assuming you want hemmed edges, measure from the bottom of the cutting board to where you want the fabric to end. Add 1 inch to this number (one half inch is for the bottom hem, the other is for the top hem).
Next, measure widthwise from side to side of the cutting board. Again, add one inch to this number.
Use your measuring tape and pencil to mark these measurements on your fabric, then cut them out.
If you want rough edges, simply measure from the bottom of the board to the spot where you want the fabric to end. Then measure the width from side to side. Mark these on your fabric and cut it out with scissors.
Attaching the Fabric
Here we come to another decision! Do you want the pushpins to show on the bottom? Or do you want them to be covered? I personally liked the look of a clean bottom with pushpins going up the sides.
To get this look, lay the fabric out on the bottom of the cutting board. Make sure the side of the fabric you want showing is facing down. Using your hammer, hammer in the pushpins all along the bottom of the board. Do not put pins in the corners. Try to keep the pins all as even as possible.
Next, choose a side to start on. Fold the fabric on sides by about 1/2 inch to create a clean, hemmed edge. Start in the bottom corner, then add pins all the way up the side. You can do as many or as few as you want!
When you get to the top, fold it down a half-inch BEe FORE you hammer in that last top side pin.
Repeat the process on the opposite side.
If you just want raw edges all around and want to see pins on all sides, simply lay the fabric on the board and hammer pins in the entire perimeter (except the top of course). Simple!

Top Hem
When I did this project I simply folded down the top of the fabric and hammered pins in either top side corner. This gives it a hemmed look. However, when you take something out of the fabric pocket that top piece of fabric will flip outwards. This doesn’t bother me, I just tuck it back in.
I mostly use my cutting board for display purposes so it isn’t getting a lot of traffic.
However, if you plan to use yours for functional kitchen storage where you will frequently take things in and out, I would recommend putting a real hem here. Either run in through your sewing machine, do a simple straight stitch across the top by hand, or grab some fabric glue and glue it in place.
Where to Buy a Cutting Board for the Project
The cutting board I used is from the Target dollar section. Technically it is a charcuterie board but it works just fine. I scooped it up for only five bucks!
Surprisingly I haven’t found many cutting boards at thrift stores. More rare than cutting boards in general are the kind with handles, which is what I prefer for this project.
You can get this one on Amazon for $12, which is about the cheapest I’ve seen for a decent-looking, hangable cutting board.
Which Style of Cutting Board Works Best?
Personally I’m a fan of cutting boards with a handle. I like the look of them, especially having the extra heigh to go over the spoons or utensils stored inside.
The other benefit to a handled cutting board is it will likely have a hole in the end, making it significantly easier to hang on the wall.

How to Hang the Cutting Board
I like having the style with a handle on top so you can easily hang it.
If you want to use a cutting board without a handle, you can mount your cutting board with picture frame hooks, wire, etc.
I would not use command strips as I don’t think they would be sturdy enough to hold up the weight of the wood.
Displaying Your Cutting Board Craft
I keep my cutting board hung in the kitchen with a few cute decorative spoons in it. If I had the wall space I think it would look really neat to have a variety of cutting boards and fabrics all hung up together.
You can also keep them on your countertop propped up against the wall.

Important Tips
- Use whatever pins you want, but make sure they aren’t going to go through your cutting board.
- If you ignore tip number one, please be sure to do your hammering on scrap wood, another cutting board, etc. Yes, I ignored my own advice and now have tiny pin pricks in my countertop.
- Striped fabric is nice for this project. It makes keeping nice straight lines on the fabric folds easy peasy.
Watch and Learn
Pin it for Later