Replacing Chicken Coop Windows
This week at the farm our weather is finally taking a permanent turn towards the cold. With ancient and broken windows letting the cold blast in, it was high time I finally got around to replacing the chicken coop windows.
Craftswoman of the Highest Order
I barely know a hammer from a screwdriver when it comes to construction. Don’t get me wrong. I love building things, working with tools, and learning new skills. I am definitely not a details person when it comes to building things so I will never be a finishing carpenter. Still, we have a small farm and that means like it or not we have to learn many hands-on skills in many different areas.
Wendell Berry says, “We have neglected the truth that a good farmer is a craftsman of the highest order, a kind of artist”. While he might be talking about the art and craft of grazing livestock or managing animals as an art, I often think about the craftsman part. Electricity, fencing, carpentry, plumbing, all these are things I have dabbled in for the basic operations of our farm. I don’t consider myself a “fine” craftswoman in any regard. I do consider myself a “willing” craftswoman and for me that is enough.
Our Chicken Coop
There have been farmers on this little chunk of land since the early 1800s. Our coop is the oldest building still on the property. We think it is from the 1920-30s era. My husband hates it because it needs a lot of work. Truthfully that’s most things around this farm.
I love it. The old windows, the classic white exterior. Thinking about all those who have used it before us.
Everything else on our farm seems to be from the 1970s and made of plastic that is slowly but surely disintegrating.
While I hate to change out the classic coop windows for something more modern, the fact is we need coop windows that function. The old windows were mostly broken or made of very thin glass. They weren’t able to open and close for warmth or ventilation.
Now we can open them in the summer and close them up in the winter. Eventually when we re-side the coop they will look nice with the sheet metal as well.
Tools and Supplies for Framing in a New Window
I had some pretty basic tools to frame in these windows.
- Cordless Drill
- Hammer
- Circular Saw
- Screws
- 2×4’s
- Plywood

How to Replace Chicken Coop Windows
The first step in replacing coop windows is to gather your supplies. I highly recommend making sure your drill batteries are charging the night before you plan to start work.
I feel like half the time involved in any project is gathering and hauling around all the equipment.
Next, remove the old framework if you don’t plan to use it or it is rotten.

I simply used a hammer and some elbow grease to pry out all the old framing boards. Some I kept for an upcycling project, the rest I tossed in the burn barrel.
Next, measure the window openings width wise. Cut 2, 2×4 boards to match. Screw them in place on the bottom and top of the frame.
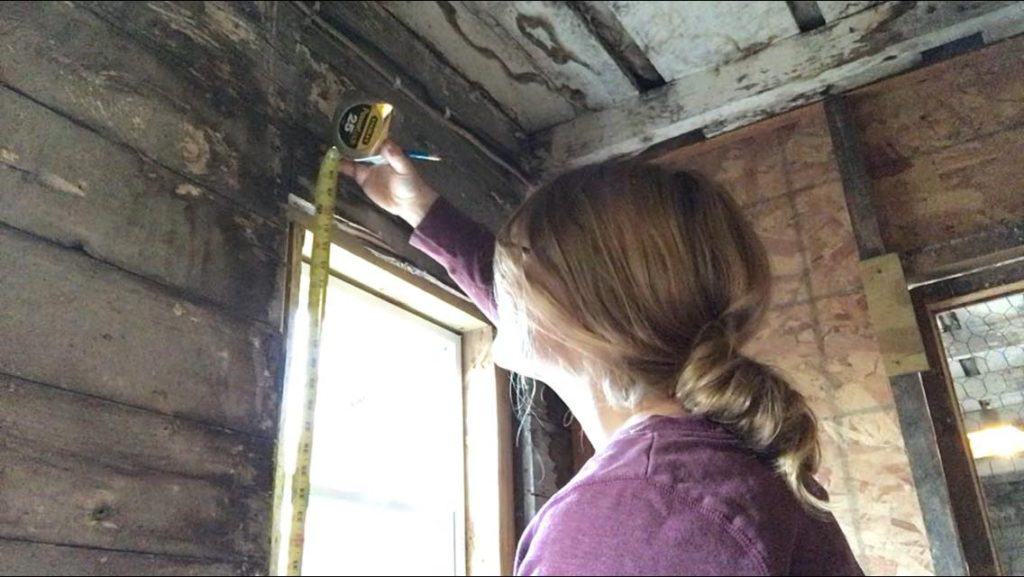
Next, measure the distance between those two boards (from the bottom of the window to the top). Cut two 2×4’s to size and place them on the sides. Mine were a snug fit so I had to hammer them gently into place. Screw these boards in as well.

Since my windows were smaller than the gap, I added a small shim on either side. This is a somewhat thinner piece of wood that adds a little thickness to the edges making the window fit more snug.
After that I placed the window in position and screwed it in place. This would be an easier task if you have someone to hold the window while you drive the screws.

From the inside of the coop, I measured across width wise just under the window. I cut a 2×4 to fit, and placed it snugly under the window and screwed it in, driving the screws up and in from an angle.
Technically I think you are supposed to put that cross board in first, then the window second. It was just easier this way for me to make sure I was getting my board in just the right place.
Now this is about as far as I went with my project because we plan to put sheet metal on the front of the coop. Depending on your coop situation you might need to add some finishing framing and weather proofing on the outside.

Final Thoughts on Replacing the Chicken Coop Windows
In my previous job I coordinated a county 4-H program. Our motto there was to “Make the best better”. Yesterday my “best” was a bunch of random screws half driven in to a window frame (see the video below). My “better” was a perfectly installed window that looks just the same as how my dad showed me to do it.
The other motto in 4-H is to “learn by doing”. I can’t agree with this more. There is no way to learn a new skill other than diving in. Mistakes will be made, but that’s okay. We learn, we improve, and we do better next time until we have something we can be proud of. Even if you never reach the ideal of perfection, just the fact that you got out there and did it is something to take a huge amount of pride in.
Watch and Learn (from my mistakes)
Pin it for Later