DIY Dutch Door for Livestock
We needed a way to protect my husband’s rabbits from cold winter weather while still allowing good air flow and sunlight. I set out this week to make a simple DIY Dutch Door for Livestock!
What is a Dutch Door?
Dutch doors are also sometimes referred to a double hung door. My husband insists they are called “double Dutch doors” and refuses to believe that is a jump rope term.
Essentially they are a door that has a separate top and bottom that can open and close independently from each other or be latched together so they open as one door.
These came about around the 1600s and were used largely for the same reason they are used today. The bottom can be kept closed to keep livestock out (or kids in) and the top opened to let in fresh air and sunshine.
What are the benefits of a Dutch door?
The main reason we are using a Dutch style door is to keep out chilly winter weather while allowing for plenty of sunshine. Just like rural folks hundreds of years ago, we can benefit from this style of door by keeping pesky livestock out of a house or in their stall.
Tools for Making a DIY Dutch Door for Livestock
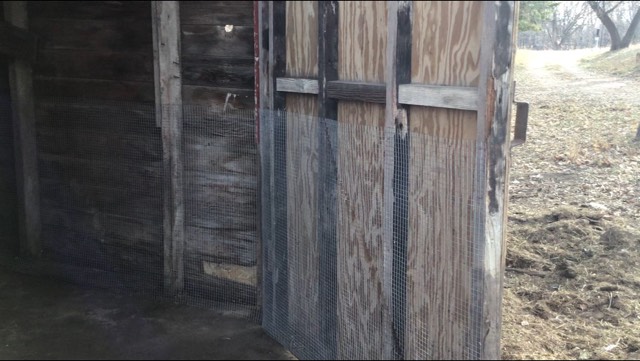
In our case we have an existing door that we are turning into a Dutch Door. Thankfully this means it didn’t take much to make the switch. This door is also nothing too fancy. It’s clearly a homemade, very simple door made to close up our cute little red shed. As such I wasn’t too worried about messing things up.
Regardless of how nice your door is, the general concepts are the same.
Some items you will need might include:
- Hinges
- Latches
- Screws
- Circular saw, sawzall, or other tool for cutting the door in half
- Sandpaper
- Cordless Drill with bits
How to make a DIY Dutch Door for Livestock
If I can make a Dutch style door, anyone can!
Add Additional Hinges
With my door I determined where I wanted to split the door, then looked to see where the hinges were. The bottom door would have two hinges so I just needed to add an additional hinge on top.
Stabilize the Door
Again, our door is a homemade operation that needed some stabilizing so I added in bracing along what would be the bottom of the door.
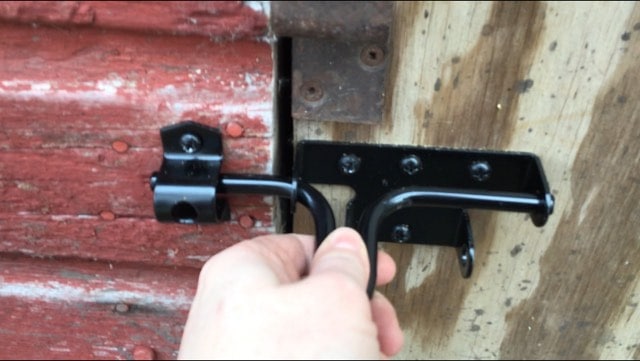
Add a Latch
Our door didn’t have a way to latch shut at all, so I first placed a simple latch on what would be the bottom door/ would latch the entire door shut if the top is secured to the bottom.
These latches are affordable and easy to install. Make sure you place it the correct way so it secures downwards, not upwards.
Cut the Door in Half
Once you’ve done all the prep work, the last thing to do is cut the door in half.
Now, if you have a very nice door, I’d recommend removing the door completely from where it is hanging, place it on a solid surface, and cut it in half that way.
Since our door again is nothing fancy and I only had the length of a toddler’s nap to get this done, I cut my door while it was still hanging.
Make sure to draw a level line across the door so you make as straight a cut as possible. Mine most definitely tilts downwards but hey, it still works!
Once you’ve made the cut you may need sand the edges down to tidy things up.
Add the Connecting Latch
The last thing you’ll need to do is add a final downward latch to connect the top door to the bottom, when desired.
How long does this project take?
Depending on how quick you are and adept you are with tools, this entire project could be finished in a half hour. For me it took closer to an hour. That’s just because I had to dink around with uncharged batteries and scrounging up correct sized drill bits that I hadn’t get destroyed.
Watch and Learn
As always I caution anyone with any sort of skill in carpentry/construction to NOT watch my videos as they are probably painful. BUT, if you are a “let’s slap this thing together” type person like I am, watch away!

Pin it for Later